Priming Tools & How to Use Them
What is Priming Exactly?
How We’ve Defined Priming:
Priming is a way to clear the slate and prepare the body, nervous system, and brain for moving.
Priming can be done before complex movement starts, as in before you get on the reformer or start the mat exercises. It can also be done as a part of your progression within a session in order to take a student from mildly complex to more dynamically complex movement.
The tools we use are based on the work of Thomas Myers, Phillip Beach, Elizabeth Larkam, the Feldenkrais Method, Alexander technique, Franklin Method, MELT Method, Yamuna Body Rolling, Dr. Eric Cobb and Z-Health, and more.
Priming can be done using props from small balls to foam rollers, physio-balls to elastic bands. The work can be sitting, standing, lying down, kneeling, or side lying.
Remember that priming helps to accomplish these things:
- Stimulates the fascia
- Warms up & organizes the body
- Awakens the mind
- Focuses attention
- Stimulates awareness and helps access subtle sensation
Fascial-oriented training principles:
- Movement across many planes:
- Changing planes frequently either from one exercise to another or within one exercise.
- EXAMPLES: Saw is a good example of a movement that can be considered priming. Another example would be to start with lunging, move to elephant, kneel for reverse abdominals, lie down for footwork, side lie for single leg footwork, sit for short box, lie prone for pulling straps series, lie supine for backstroke. *Taking into account smoothness of transitions and ease or flow of movements one to another.*
- Movement across varying force vectors (movement coming from one point, moving through another point):
- Instead of moving primarily within one plane (supine arms lat pull), move across multiple planes to change the vector of force (the line along which force is traveling).
- EXAMPLE: Reformer. Supine arms lat pull = primarily single vector VS. Oppositional L-shape lat pull = multi-vector.
- How: Oppositional L-shape Lat Pull – Right arm up to ceiling (sagittal), left arm out to side (frontal), both pull to the carriage and then reverse – left arm moves to point to the ceiling directly above left shoulder, right arm moves into T shape level with right shoulder).
- Rhythm and Flow:
- Not stopping and starting but rather weaving movement together. Most easily incorporated by using the breath to ebb and flow in and out of movement.
- EXAMPLE: Lunging on the reformer is a good priming movement, but can be improved if it’s rhythmic and flowing, allowing the body be moved by the breath in and out of the stretch.
- Ballistic movement – Bouncing. (Promoting resilience and malleability in the tissue).
- EXAMPLES: This can be from actually bouncing like on a trampoline to lightly bouncing on a physio-ball, to pulsing movement, to gentle pulsing in a stretch. Ballistic movement used to look like flopping around (think Jane Fonda, Richard Simons), which is no bueno as it can put joints at risk. Even joe used to do good ole fashion ballistic movement, but what we’re talking about is softer, more relaxed and thoughtful – working within a safe range for the body.
- Preparatory and counter movements: From a simple point of view this would look like a baseball player throwing a ball: they wind up and follow through. For Pilates it can look similar: prepare for the main action by going in the opposite direction (move into the spring – no tension), move into the main action (increasing tension), move beyond the main action (moving into less tension and/or greater range depending on the spring orientation).
- EXAMPLE: Side kneeling arms on the reformer. Instead of just doing an overhead arm press keeping the body still, first (if you are reaching the left arm) side bend into the left (no tension), straighten up and catch the tension then reach up increasing the tension, then at the top of the shoulder’s range move into right side bend. The movement now has 3 parts: preparation, main action, countering/oppositional action, rather than just 1: main action.
- The other way we can use this concept is making sure you are always countering each exercise with it’s opposite (flexion with extension, reversing directions, moving with opposite spring tension).
Other Important Ideas:
- Start with the feet to stimulate the fascial network and help integrate the nerves that run between the soles of the feet, the low back, and the pelvic floor.
- Work joint by joint to optimize reciprocal movement above and below the chain. (Z-Health R Phase).
- Work with diagonals and opposition to stimulate the brain.
- Work with mindful breathing to optimize/stimulate the Relaxation Response, calm the mind, and positively influence the student’s internal learning environment.
- Influence the students external learning environment by creating a safe, quite, appropriately lit, and inviting space. (This also primes the body).
Library Definitions
Priming Props = Apparatus: Exercises within the Priming Props apparatus will most often be used in the beginning of a session, but can be added throughout a sequence to help more deeply prepare the body for a specific exercise or objective.
Priming = Category: When you are putting together your own sequences you can select specific Priming Props exercises as well as select exercises from other pieces of apparatus that are Priming in nature.
For instance, you might start a session with Priming Props exercises Foot Rolling (small ball) and the Thoracolumbar Fascia Release (small ball), move to the reformer and select a Priming Category exercise like Footwork (any double leg variation). The Priming Category exercises are there to help you identify exercises that are going to promote fascial health and tissue integration so later, more challenging exercises, are better received by the body and your student experiences more success.
Priming Sequences: These sequences focus on fascial-oriented training principals and are good for every kind of body although particularly for injured and deconditioned bodies, or those dealing with limitations such as scoliosis, stenosis, arthritis, autoimmune diseases and other conditions need more systemic attention.
With that said, we also use the Priming Sequences a lot for new students who are trying to establish new habitual patterns of moving (which is pretty much everyone who walks through our doors 🙂
The Archetypal Postures and Erectorcises will be found under Mat, and categorized as Priming. They will also be designated by either an (AP) or (E) for further clarity.
Examples
From the Mat
- 3-D Breathing
- The Wave Breath
- Sacral Nod
- X-Reach Rollover
- Twist with Oppositional Eye Tracking
- Cat/Cow with Oppositional Eye Tracking
- Snaking Feet/Heel Slides
- Knee Sways/Circles
- Foot Fanning/Wringing
- Hang Belly Breathing
- One Lung Breathing w/Side Bend
- One Lung Breathing
- Pelvic Clocks
- Sitz Bone Reaches
- Scapula Swings
- Eye Clocks
Archetypal Postures & Tuning
- Toe sitting – AP
- Drinking posture – AP
- Cowboy posture – AP
- Long sitting – AP
- Cross-legged posture – AP
- Side-saddle posture – AP
- Tailor’s posture – AP
- Tuning:
- Prone hip width parallel rest/hip rocking
- Prone wide external rest/hip rocking
- Prone closed internal rest/hip rocking
Priming Props
- Foot Rolling
- Hip Release
- Pelvic Floor Release
- Thoracolumbar Fascia Release
- Oblique/QL Release
- Lat/Lower Trap Release
- Upper Trap/Posterior Shoulder Release
- Anterior Shoulder Release
- 3-D Breathing with Band
- Thoracic Arch/Curl (Roller/Ball)
- Shoulder Slaps (Ball/Roller)
- Shoulder Circles (Ball/Roller)
- Spinal Release (Roller)
- Hand Rolling (Small Ball)
- Foot Articulations (Band)
- Intercostal/Diaphragm Release (Small Ball)
- Sitz Bone Reaches (Small Ball)
- Knees Sways (Small Balls)
- Quadriceps Release/Single or Double (Roller)
- IT Band Release (Roller/Ball)
- Calf/Lower Leg Release (Ball/Roller)
- Point/Flex (Small Ball)
- Invert/Evert (Small Ball)
- Sternocleidomastoid (SCM) Release (Roller)
Exercise Explanations will be coming soon! We want you to feel confident in using all of these tools, so it’s important to us that you have a clear and concise understanding of what each of these exercises are. Although we are confident that any version of these movements that you have or create, if they are in the spirit of mobilizing the whole body from a fascial-oriented training approach, will be as beneficial as doing them “our” way.
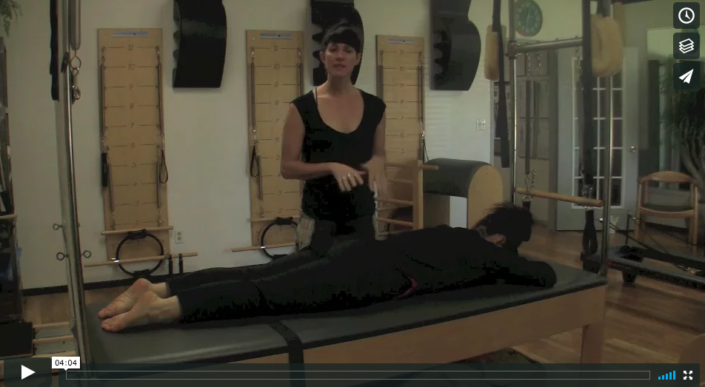
Sacral Rocking
Explanations of Archetypal Postures & Tuning & Erectorcises
Brief Explanations to Get You Started:
The order in which we recommend you begin to explore and integrate all priming movements, but in particular the ones presented by Phillip Beach, archetypal postures, tuning, and erectorcises, would be from simplest to most complex, considering load on the body, joint mechanics, as well as start and end position.
Remember that the we want to prepare the body for moving by opening it to it’s potential, cleaning the slate (both physically and mentally) so that new habits and patterns can be formed and embedded.
We recommend:
- Starting with tuning exercises and/or manipulation of dense, stuck, and resistant tissue with props and small rhythmic movements.
- Then moving to the archetypal postures that can help reestablish basic and foundationally human movements into the body.
- Finally progressing students, in small steps, to integrate the erectorcises or floor-to-standing transitions, from beginning to advanced over time. In the videos above we’ve given you some examples of how you can create these transitions.


 How are you showing up? Why are you showing up? Why do you teach? What IS teaching? Why do you care? This is Skillful Teaching: A Whole-person approach to being an expert teacher, not an expert technician. There's a difference. Want to know what it is?